GoodNotes gets most of the attention, and Noteshelf 3 and Noteful are quietly good alternatives. Both keep a PDF’s hyperlinks working, which is the only thing a digital planner really demands of an app. Both are worth the switch for their own reasons — Noteshelf if you want a planner that turns like a book, Noteful if you want the lightest, cheapest way in.
They’re on one page because the answer to “can I use my planner in this?” is yes for both, and because the setup differs in a couple of small ways that are easy to miss and annoying to discover late.
Checked in Noteshelf 3 (7.8.3) and Noteful (1.4.42) on iPadOS 26, September 2026.
Noteshelf
Everything below is Noteshelf 3, the version on the App Store today.
Import the planner
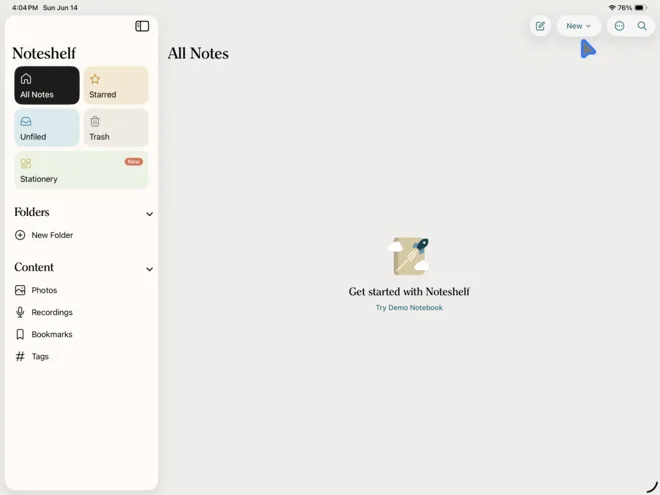
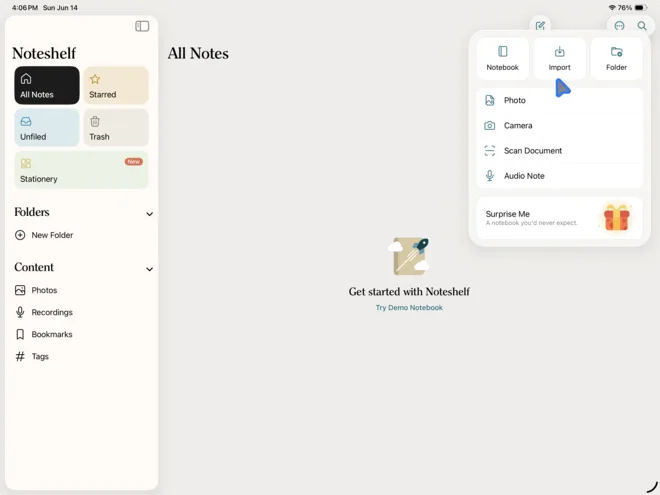
From the shelf, use New → Import, then pick the planner PDF. It lands as a notebook of its own, ready to open.
Importing is what matters here. Tapping the file in Files opens a preview, and a preview shows every page while ignoring every link.
NoteshelfImport Digital PlannerShow 4 steps, 4 screenshots
Launch Noteshelf, click on the “New” button.
With the “New” panel open, click the “Import” button.
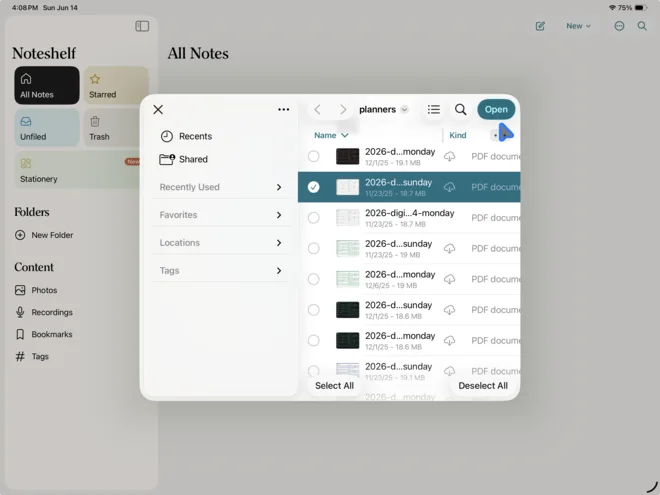
Navigate to where you’ve saved your planner files and select the version you want to use. Then click the “Open” button.
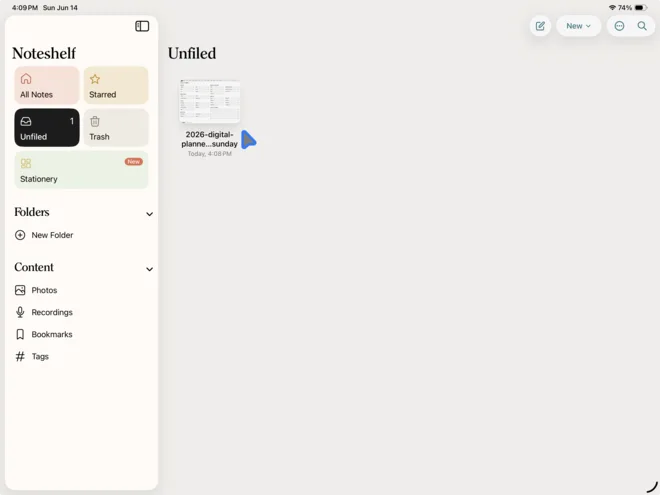
Once imported, the planner will be available to open.
Change one setting before you start
Switching Scrolling to Horizontal is the Noteshelf tip worth the whole page. Noteshelf scrolls vertically by default, which is fine for notes and wrong for a planner — you end up sliding between pages instead of turning them.
Open your planner, tap the ⋯ menu, scroll to Settings, and set Scrolling to Horizontal. The planner immediately behaves like a book.
While you’re in there, switch on Read only Mode for navigating. Noteshelf assumes you want to write, so the first time you tap a month tab with a pen selected you’ll leave a small mark instead of jumping anywhere. Toggle editing back on when you actually want to write.
NoteshelfImportant First StepShow 3 steps, 4 screenshots
For a better user experience navigating your planner, we recommend navigating in “Read only Mode”. You can toggle off this mode when you want to make edits.
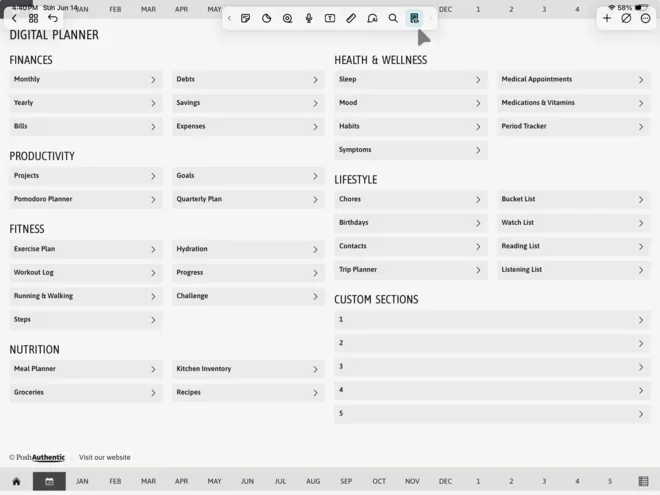
We also recommend that you make one key Settings change. Noteshelf will better present the digital planner when the Scrolling setting is set to “Horizontal”, instead of the default “Vertical”.
With your planner open, click the triple dot icon found in the top right menu.
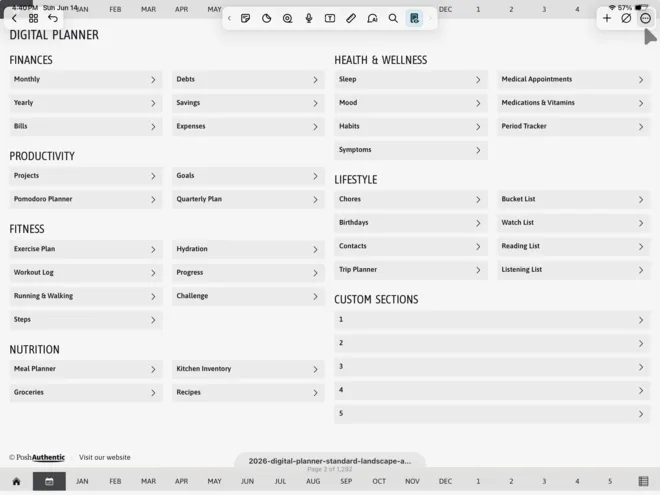
With the drop-down menu open, scroll to the bottom of it to see the “Settings” section.
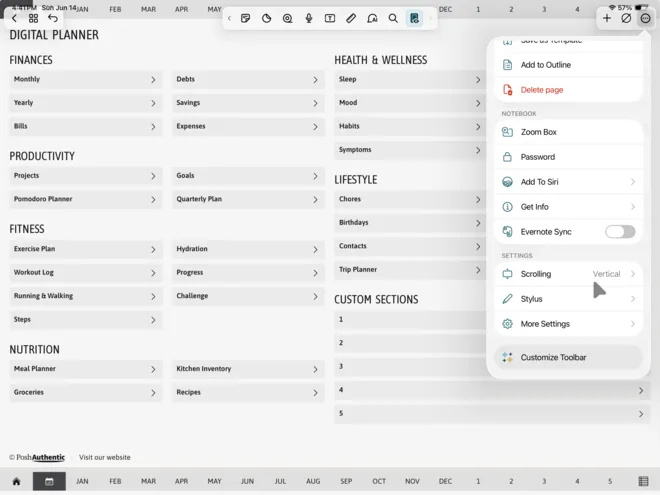
Click the “Scrolling” setting and change it to “Horizontal”.
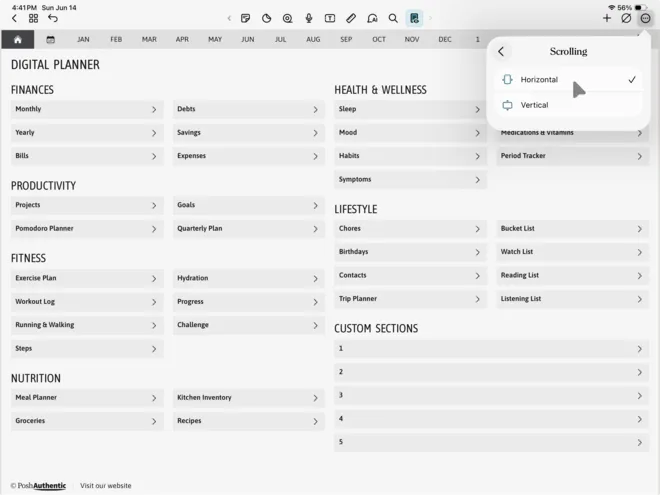
Two toggles, about fifteen seconds, and a noticeably better planner. Almost nobody mentions either one.
Add your cover
Covers usually ship as a separate file so you can pick one. In Noteshelf you import it and then move it, which is one step more than you’d expect.
Use + → Import File and choose your cover. Then open the page sidebar and drag the new page to the front. That’s it — the drag is the part people miss, because the cover arrives at the end rather than the beginning.
Stickers
Noteshelf keeps stickers in packs. Tap Stickers → Add → Add → Import from Files, select your sticker PNGs, give the pack a name, and import. The pack stays in the Stickers menu from then on, and stickers drag onto the page and resize like anything else.
NoteshelfUsing stickersShow 11 steps, 12 screenshots
With your planner open to the page you’d like to add a sticker to, click the “Stickers” button.
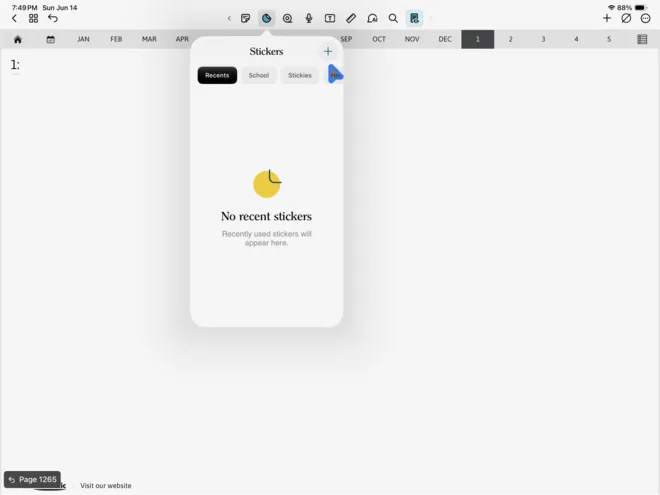
In the resuling drop-down menu, click the “Add” button.
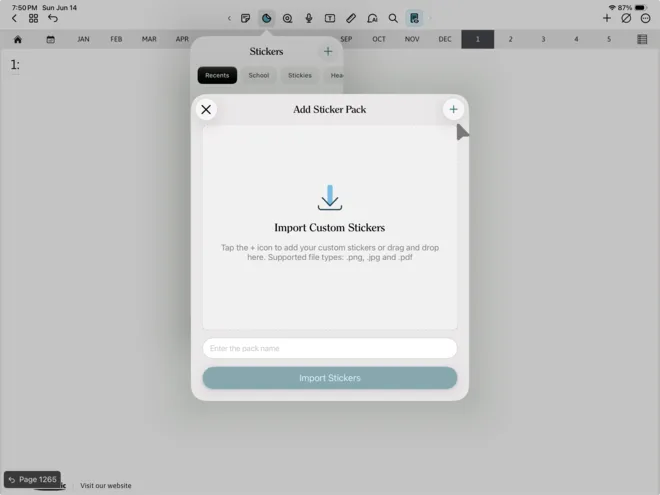
In the resulting “Add Sticker Pack” modal click the “Add” button.
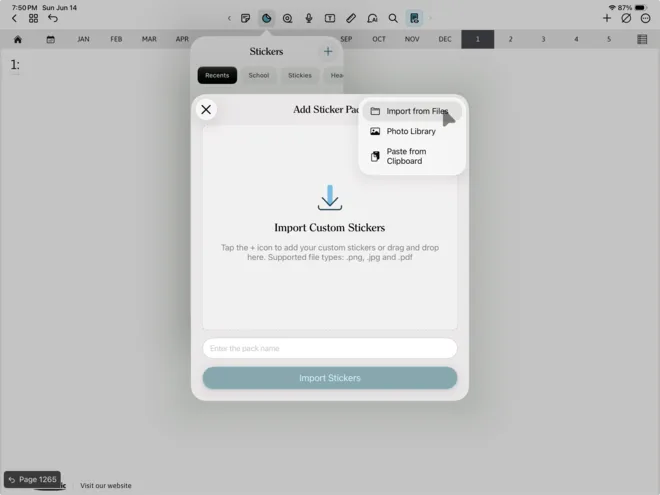
Click “Import from Files” menu item.
Navigate to the location at which you’ve downloaded your planner stickers.
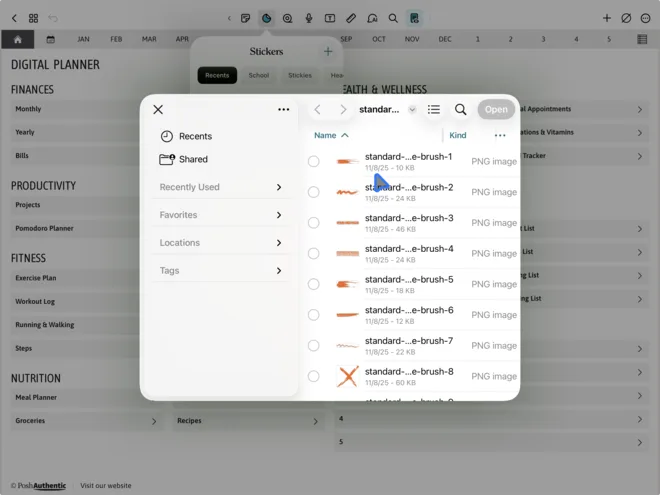
Click the sticker(s) to be added and click the “Open” button.
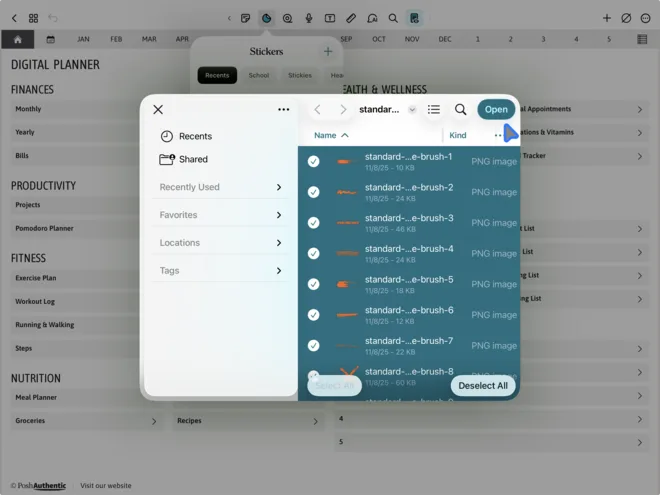
The opened stickers will now be loaded into the “Add Sticker Pack” modal. Give the sticker pack a name.
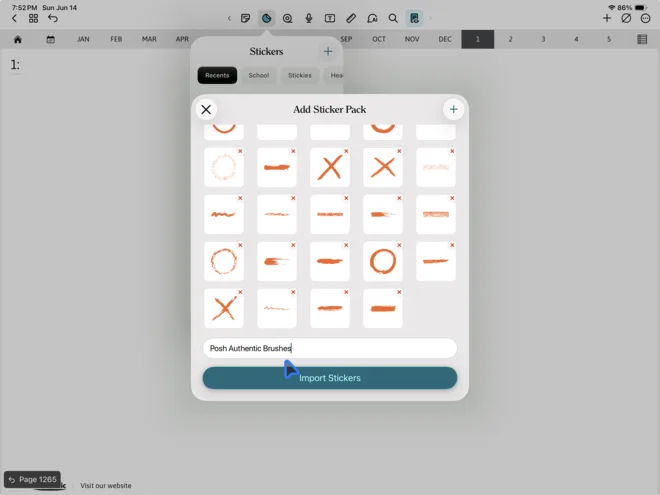
Click the “Import Stickers” button.
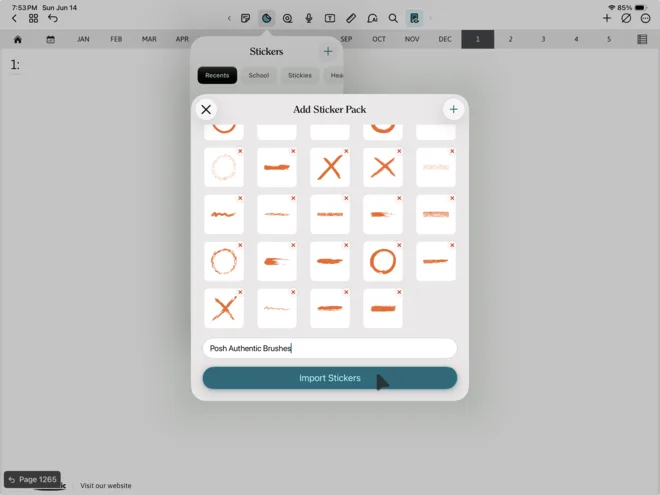
A message will appear stating “Sticker Pack saved successfully”. Click the “OK” button.
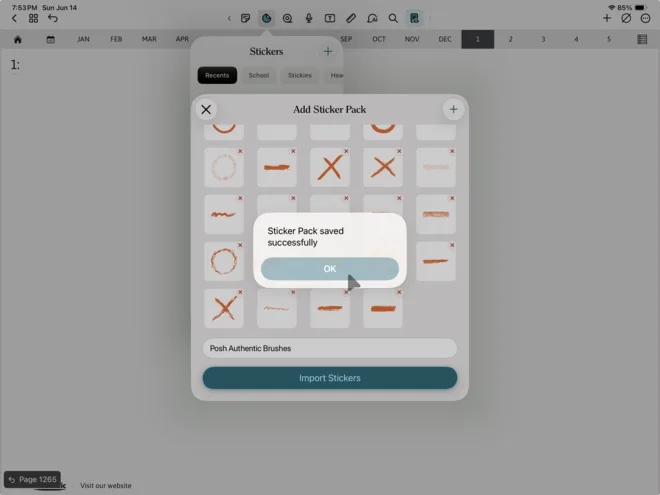
Your Sticker Pack will now be available in the “Stickers” drop-down menu.
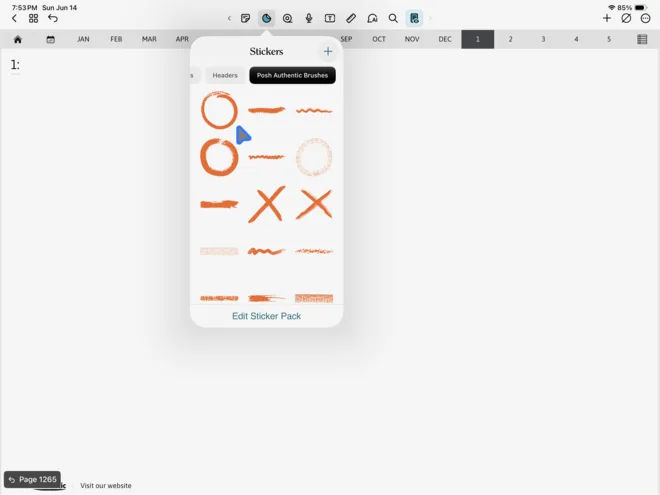
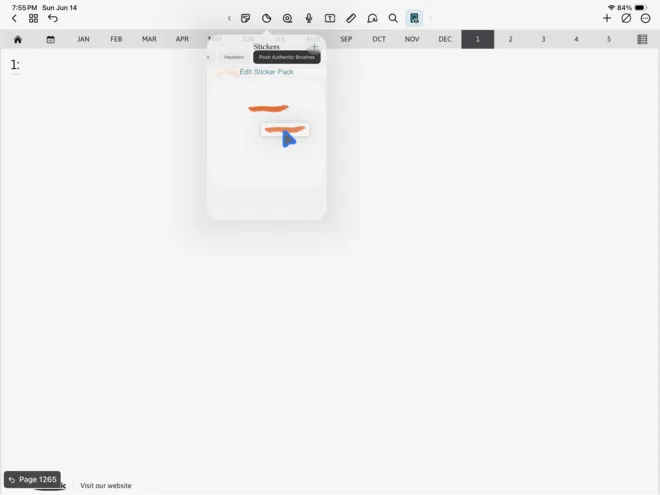
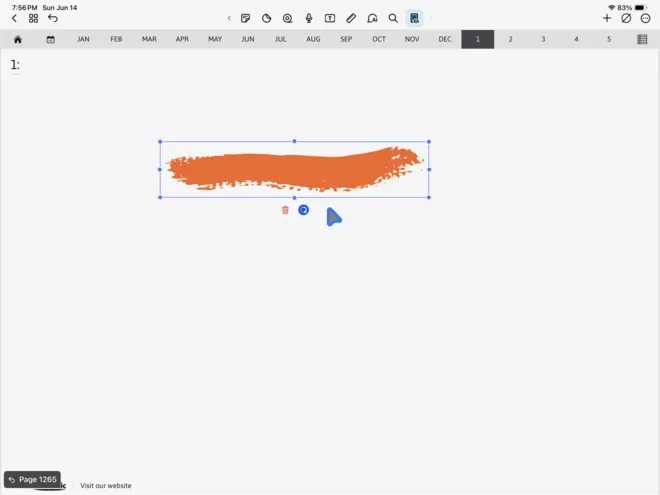
Click and drag a sticker to your page and position, resize or rotate it however you’d like.
Everything else
Pages duplicate, copy, rearrange, and delete from the page sidebar — select a page, tap the caret below it, pick what you want. Copying works as Copy then Paste Below, so paste while you’re on the page you want it to follow. Deleting lives in the ⋯ menu rather than the sidebar.
Noteful
Import the planner
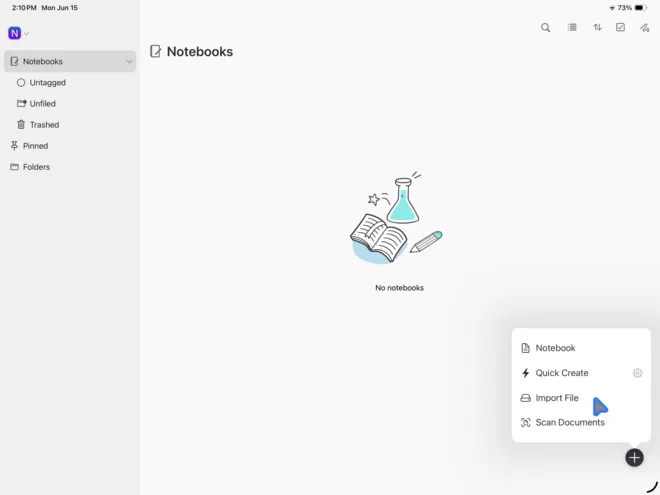
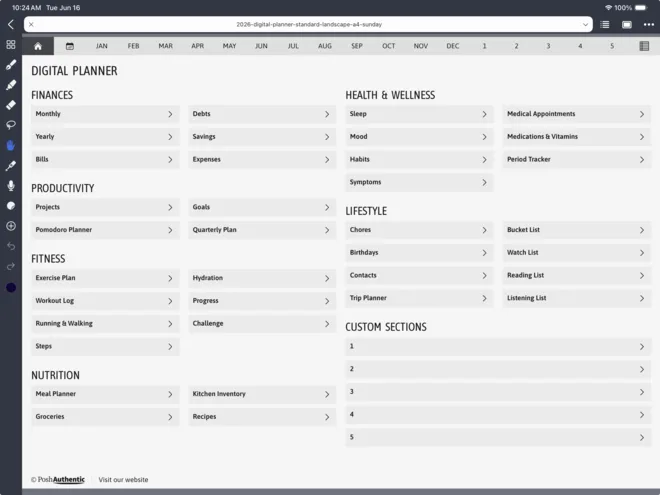
Tap + → Import File and choose the planner PDF. Noteful opens it for you as soon as it’s in.
NotefulImport Digital PlannerShow 4 steps, 4 screenshots
Launch Noteful and click the “+”/Add button.
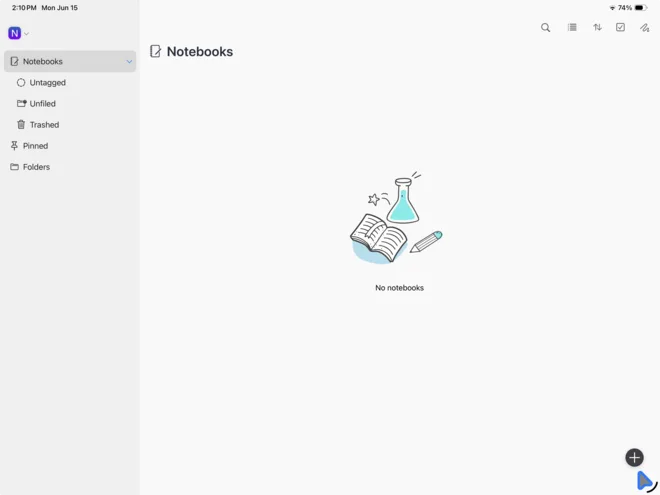
In the resulting context menu, click the “Import File” menu item.
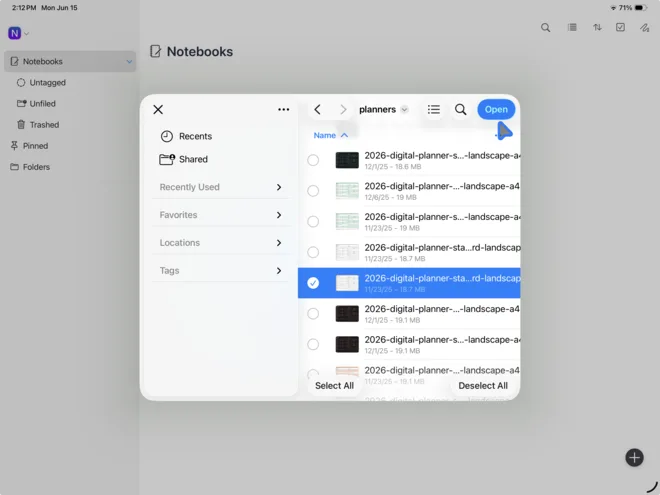
Navigate to where you’ve saved your planner files and select the version you want to use. Then click the “Open” button.
Once imported, Noteful will automatically open the planner.
Press and hold to follow a link
Noteful is the easy one here: no mode to switch. Press and hold a tab or a link, and the planner goes there, whatever tool you have selected. A quick tap with a pen still leaves a mark, so make the hold your habit.
If you’d rather tap, pick the Hand tool first. Hand for getting around, pen for writing, and the planner stops fighting you.
Add your cover
Open the page manager, select the first page, then + Insert → Import File and choose your cover. Noteful inserts before the selected page, so picking page one puts the cover exactly where it belongs — no dragging needed. Tap the new page’s magnifying glass to jump to it.
Stickers, and the odd first step
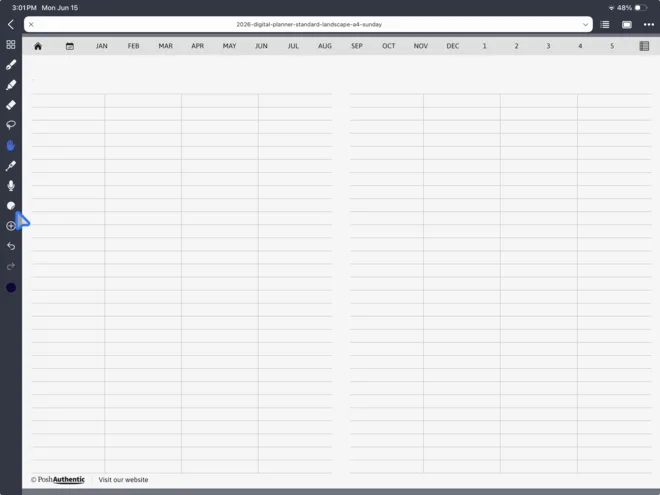
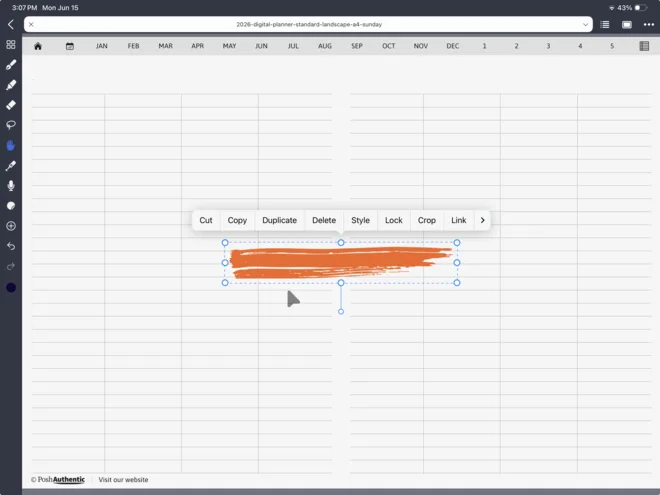
Noteful hides its sticker manager behind a step that makes no sense until someone tells you. Tap Stickers, and the first thing to do is Install Samples — sample stickers you don’t want, which is the only way the full sticker interface appears.
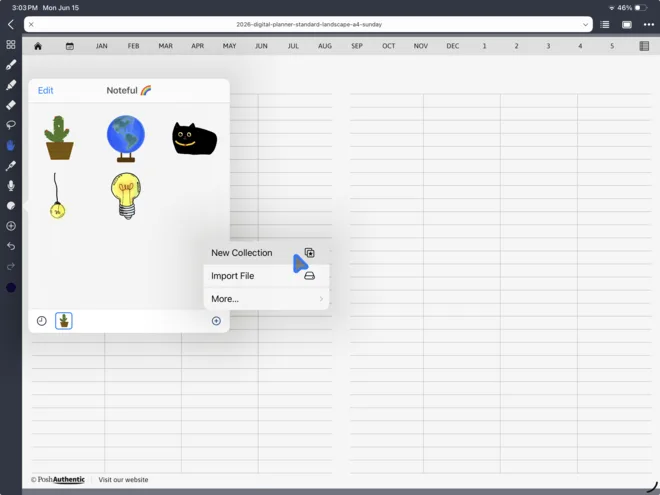
After that it’s straightforward. Tap + → New Collection, name it, then + → Import File, select your stickers, choose your new collection as the destination, and save. Tap a sticker to drop it on the page.
NotefulUsing stickersShow 13 steps, 13 screenshots
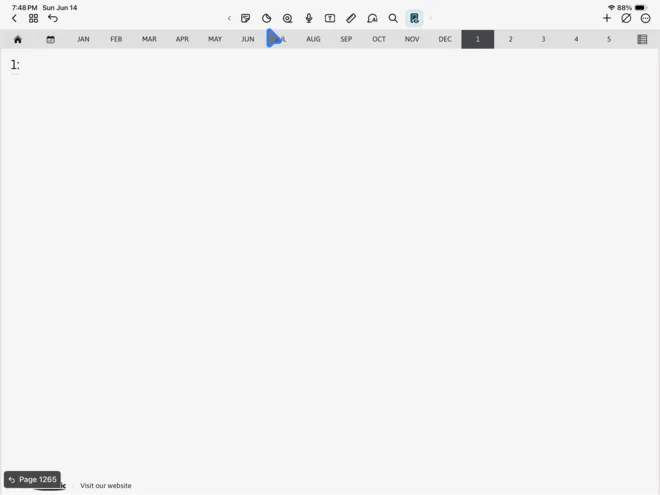
With your planner open to the page you’d like to add a sticker to, click the “Stickers” button.
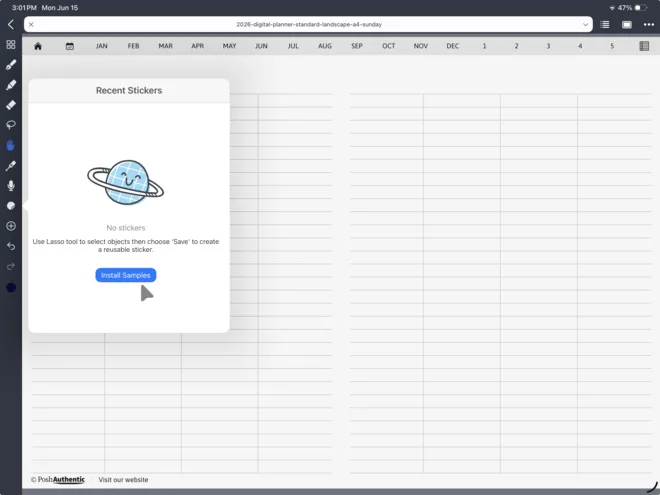
In the resulting “Recent Stickers” context menu click the “Install Samples” button. _(This is an extraneous step that Noteful unfortunately requires you do prior to gaining access to the full Sticker management user interface)_
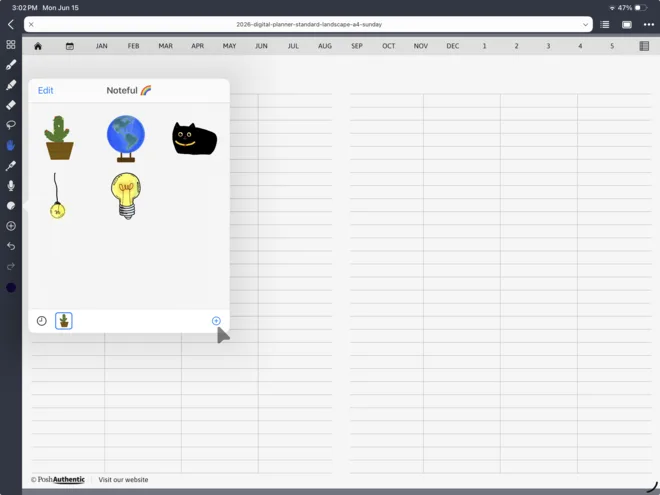
Now that the sample Sticker collection has been installed, you can click the “+”/Add button. Click it.
Let’s start by creating a new Sticker collection for you to add stickers to. Click the “New Collection” menu item.
In the “Input Collection Name” modal, enter a Collection name and click the “OK” button.
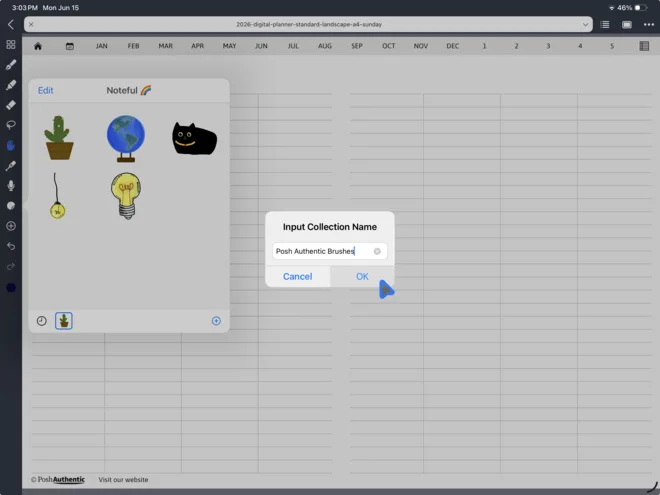
Now that your new Collection has been added, click the “+” button again.
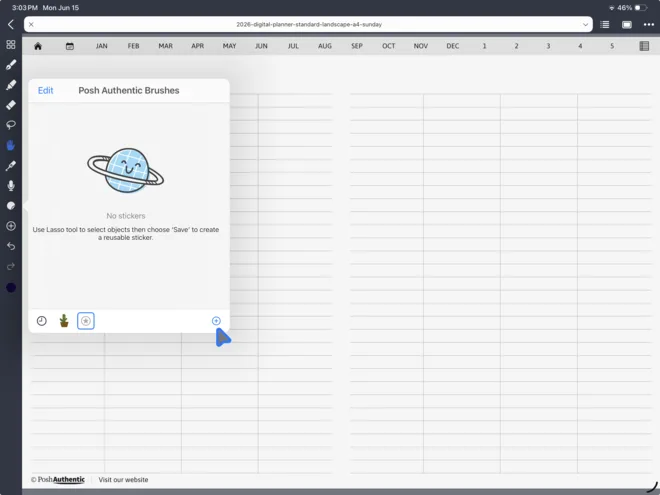
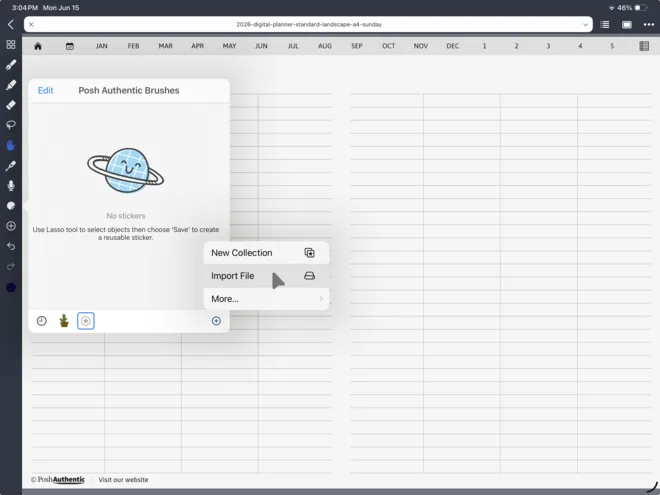
Click “Import File”.
Navigate to the location at which you’ve downloaded your planner stickers.
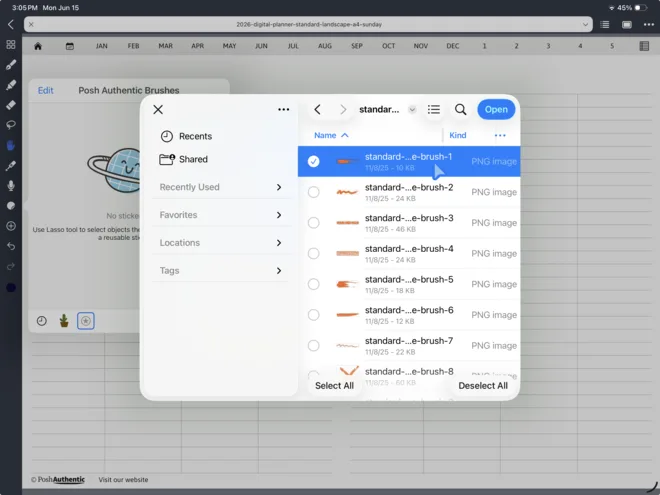
Select all the sticker that you’d like to add to the Collection and click the “Open” button.
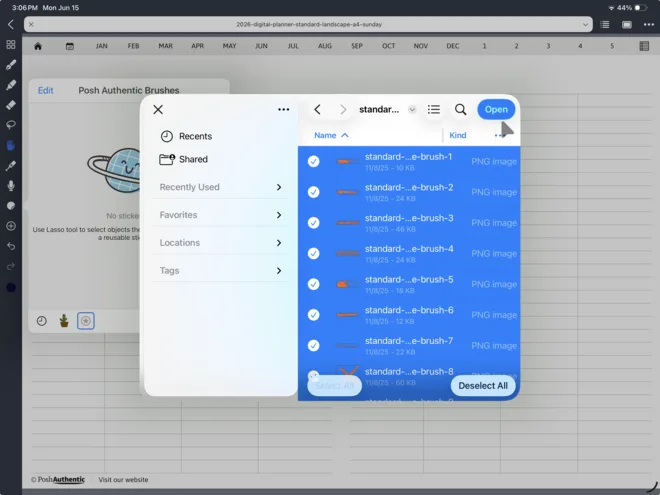
In the “Choose Location” modal, select your new Collection as the destination for your imported stickers.
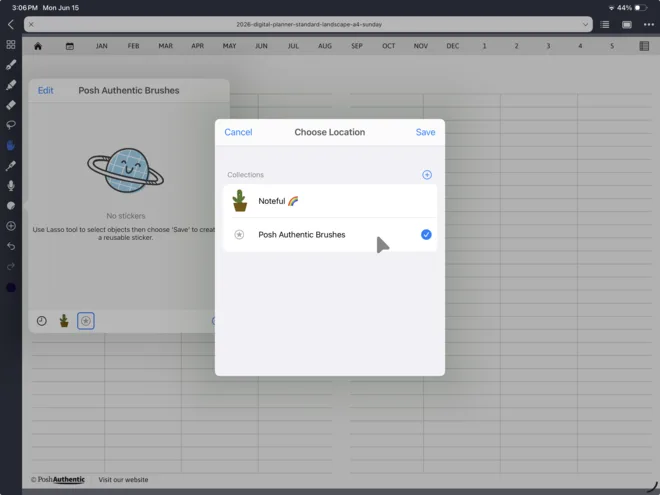
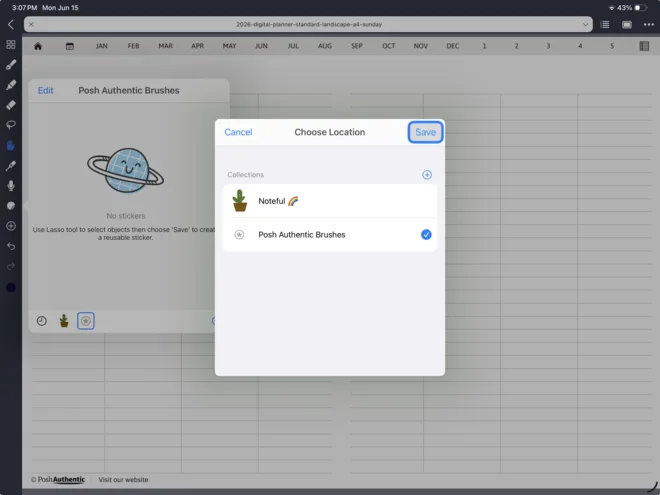
Click the “Save” button.
Your stickers have now been imported into your Collection.
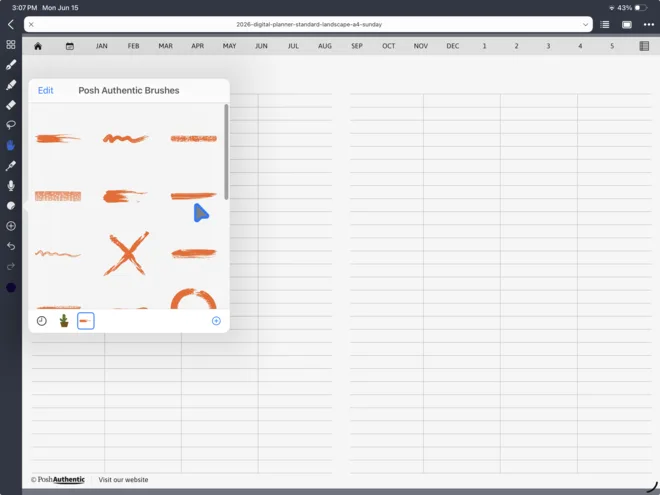
Click a sticker to add it to your page. Position, resize or rotate it however you’d like.
If you got stuck at an empty sticker panel, that’s why. It’s a Noteful quirk, not your planner.
Everything else
Noteful folds duplicating and copying into one flow: page manager, select the page, Copy, then Paste, and the copy becomes the next page. Rearranging is select-and-drag, deleting is select and Delete.
So which one?
On an Android tablet, this one’s quick: Noteful is Apple-only, and Noteshelf 3 is on Google Play as well as the App Store.
If you already own either, use it — neither is holding you back.
Choosing fresh: both are free to download, so you can try either one this afternoon. Noteful is the lighter, cheaper one. Pro is a single $6.99 payment, and there’s no subscription at all. Noteshelf 3 sells Premium as a subscription or as a $14.99 lifetime unlock. Noteshelf’s horizontal scrolling also makes a planner feel closest to paper.
You don’t have to pay to plan in either one. The planner is a single notebook, and both free versions hold it. Pay when you want the extras: Noteful Pro adds sync between your iPad and iPhone, and Noteshelf 3 Premium adds unlimited notebooks, automatic backup, and full handwriting recognition, so you can search what you wrote. If you go Premium and plan to stay, take the lifetime one.
Prices from the US App Store, September 2026: Noteshelf 3, Noteful.
On an iPad, both do the job. This is a preference, not a compatibility question.
Where to go next
- How to use a digital planner — the short version, and the three things that have to be true
- Using your planner in GoodNotes
- Setting up a digital planner on iPad
- Apple and Google Calendar integration