Digital planner stickers are images you drop onto a planner page and then move, resize, rotate, or delete. They behave like the paper kind, minus the part where you peel one crooked and have to live with it.
They come as PNG files, and the PNG part matters more than it sounds like it should.
Why the file format is the whole trick
A PNG can have a transparent background. That’s the entire mechanism.
Drop a transparent PNG onto your planner and you see the sticker — a leaf, a label, a little washi strip — sitting on the page. Drop a JPG of the same artwork and you see the sticker inside a white rectangle, because a JPG has no way to say “nothing here”. The box gives it away instantly and nothing you do in the app removes it.
So a sticker set that ships as JPGs isn’t a sticker set. It’s a picture of one.
The two ways they arrive
Sellers package stickers one of two ways, and which one you have decides how you get them into your app.
Loose PNGs. A folder of individual files, one per sticker. Works in every app, needs a minute of importing, and the files are yours to organize however you like.
A sheet or collection. Everything on one page, or bundled into a file your app knows
how to open — GoodNotes takes a .goodnotes or .collection file, and other apps have
their own. Faster to install, and it lands in the app’s own sticker panel rather than your
Files app.
Neither is better. A collection is quicker on day one; loose PNGs are easier to reuse in five years when your app of choice has changed.
Getting them into your app
Every note-taking app has a sticker panel of some kind, and the shape of the job is the same in all of them: import once, then drag from the panel onto the page. The panel persists, so this is a five-minute setup you never repeat.
GoodNotes calls them Elements. The Elements tool holds your collections, and you can import a whole collection at once or build a new one from individual files.
GoodnotesUsing stickersShow 17 steps, 17 screenshots
Using a collection of stickers
With your planner open in “Editing mode”, click the “Element” / sticker icon.
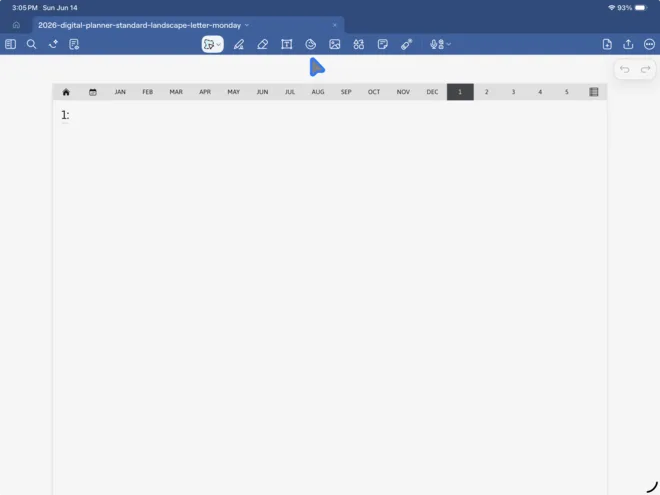
Having clicked the “Element” icon, in the “Elements” panel click the “Add Collection” button.
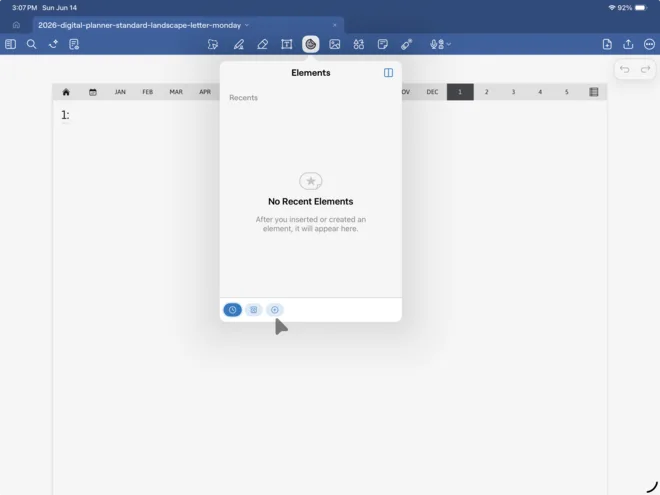
Having clicked the “Add Collection” button, the “New Collection” modal panel opens. In the modal, click the “Import from…” button.
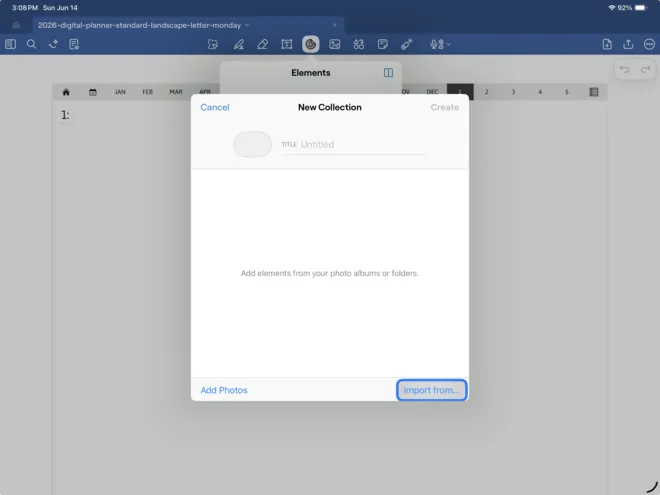
Navigate to the location at which you’ve downloaded your planner sticker collection and click the collection to be added.
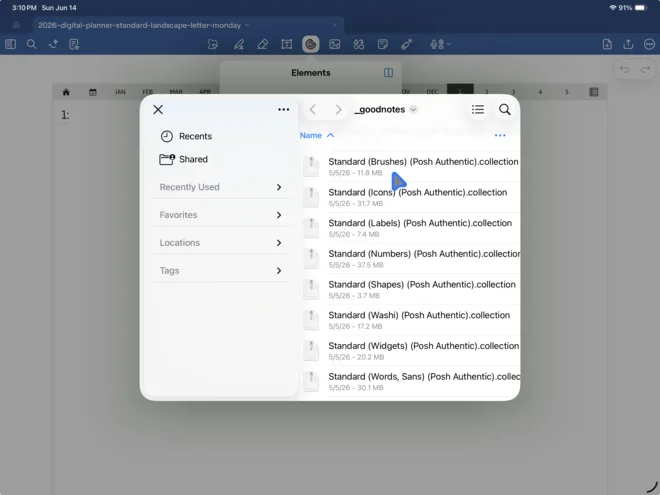
The collection you clicked will then populate the “New Collection” modal panel, with the same title as the collection file. Click the “Create” button.
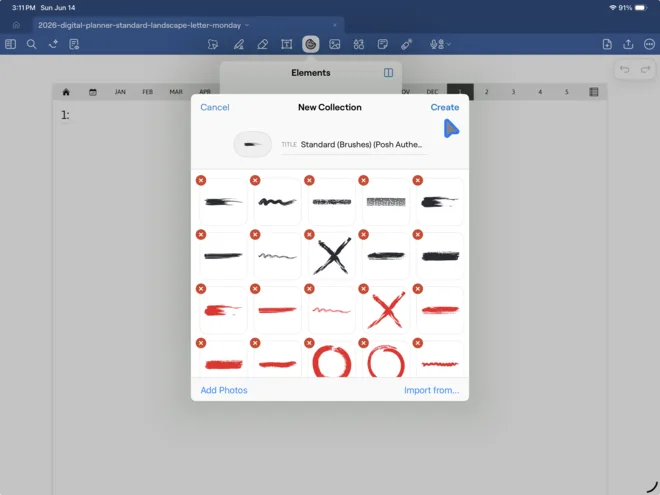
Once created, the collection will be the currently selected collection in the “Elements” panel.
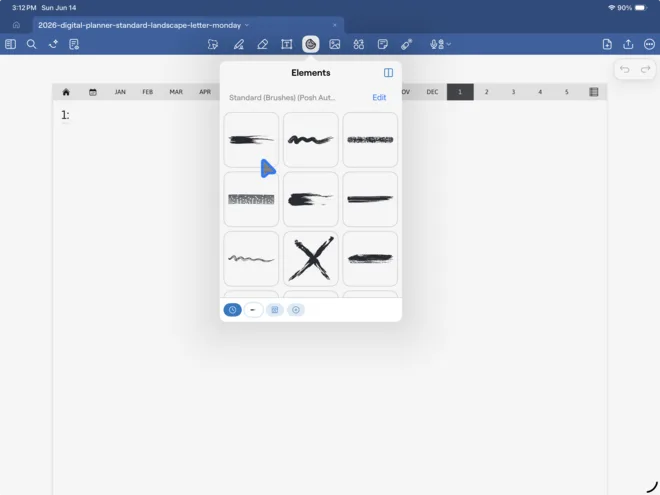
Click and drag a sticker to your planner page.
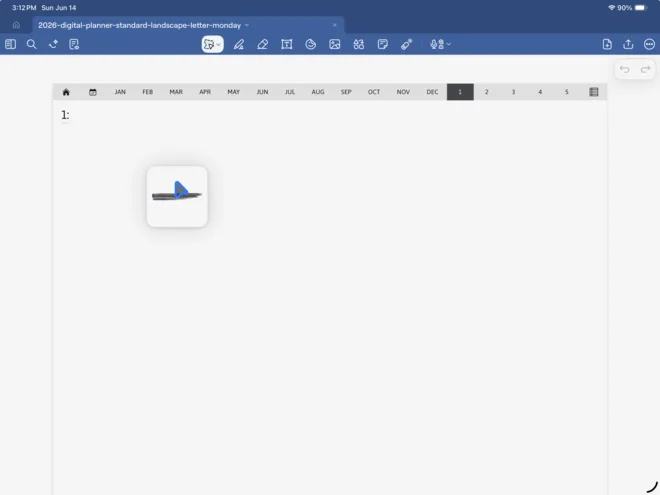
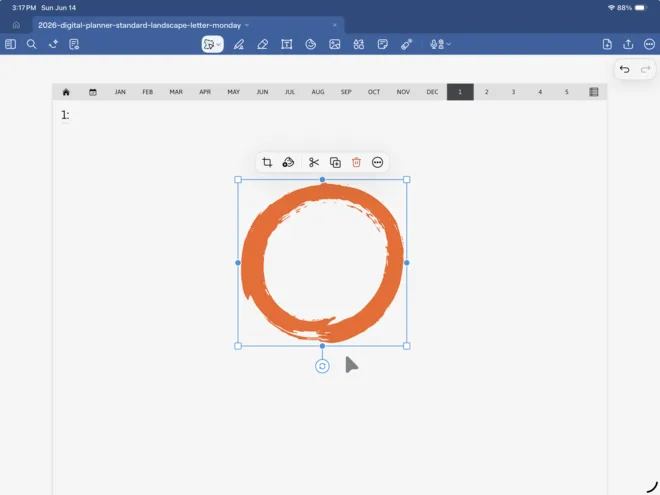
Once on the page, the sticker can be moved, resized, rotated.
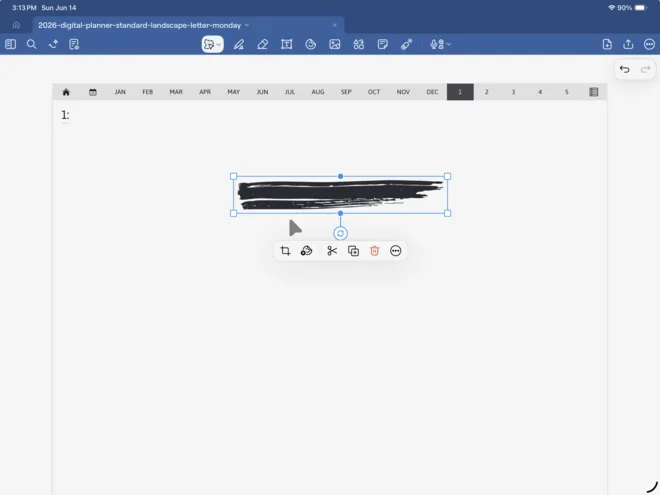
Using individual stickers
With your planner open in “Editing mode”, click the “Element” / sticker icon.
Having clicked the “Element” icon, in the “Elements” panel click the “Add Collection” button.
In the “New Collection” modal give your collection a title.
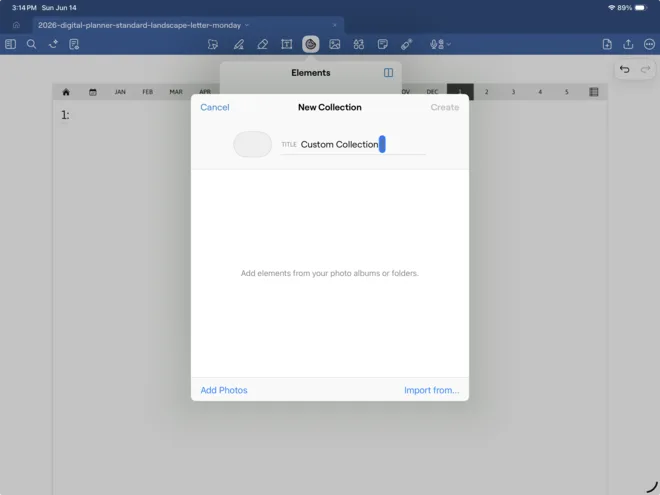
Click the “Import from…” button.
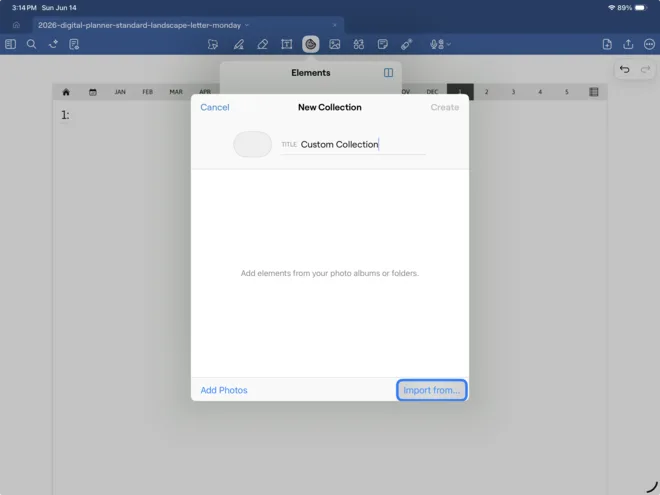
Navigate to the location at which you’ve downloaded your planner stickers and click the sticker to be added.
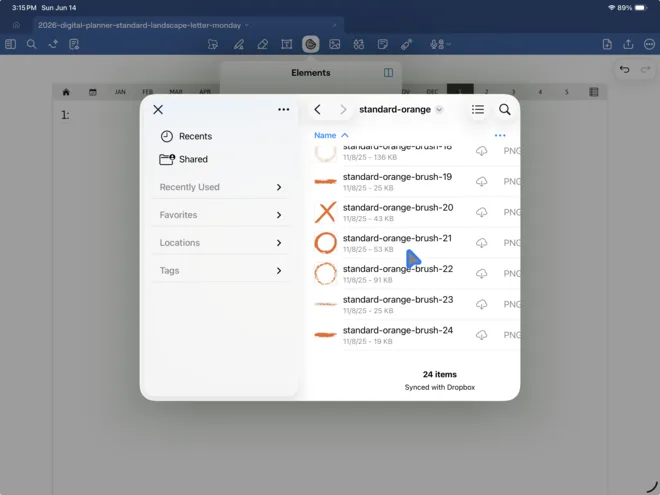
The sticker you clicked will then populate the “New Collection” modal panel. Click the “Create” button.
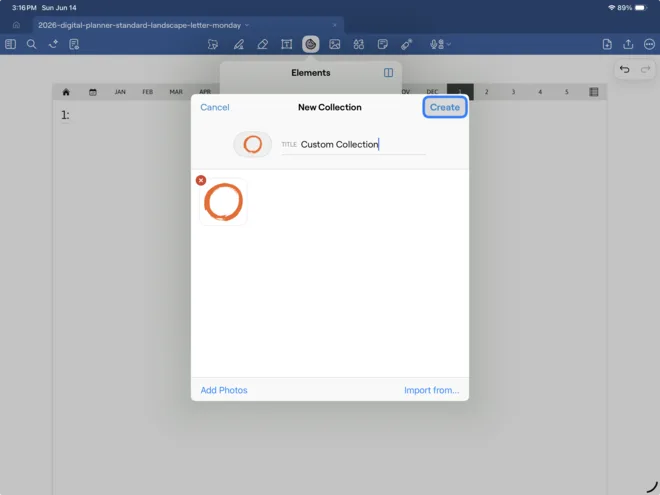
Once created, the new collection will now have your imported sticker in the “Elements” panel.
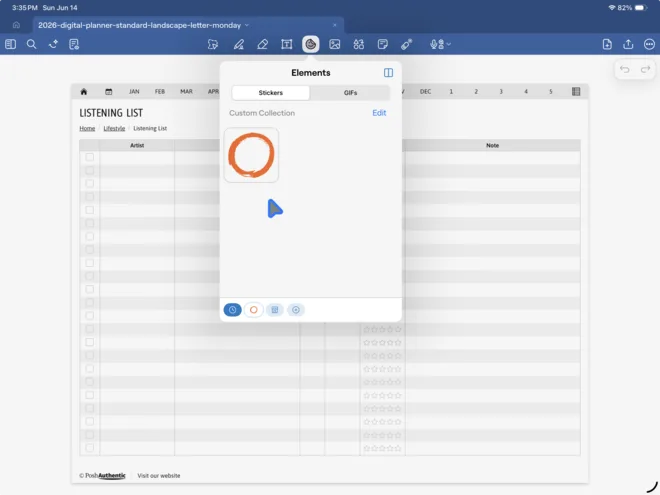
Click and drag a sticker to your planner page.
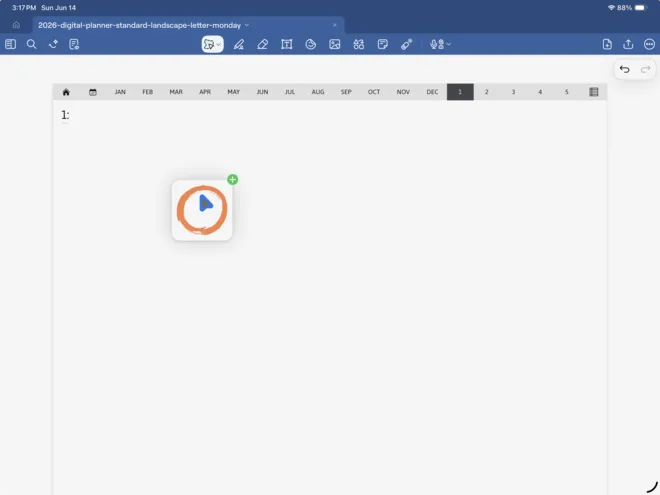
Once on the page, the sticker can be moved, resized, rotated.
Noteshelf keeps a Stickers button on the toolbar, imports files into a named sticker pack, and drops the pack into a menu you can reach from any page.
NoteshelfUsing stickersShow 11 steps, 12 screenshots
With your planner open to the page you’d like to add a sticker to, click the “Stickers” button.
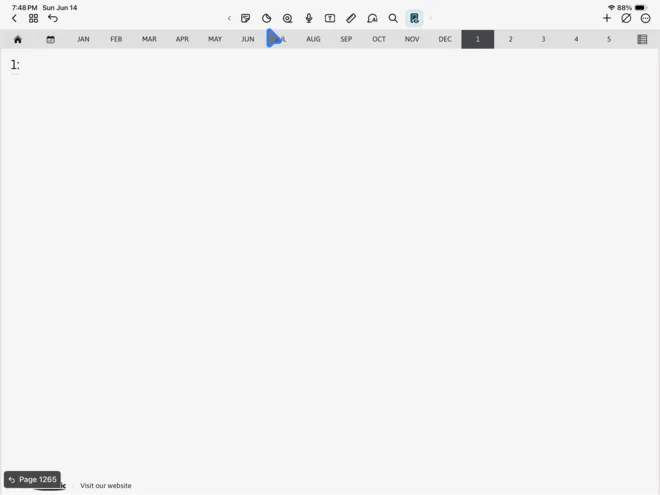
In the resuling drop-down menu, click the “Add” button.
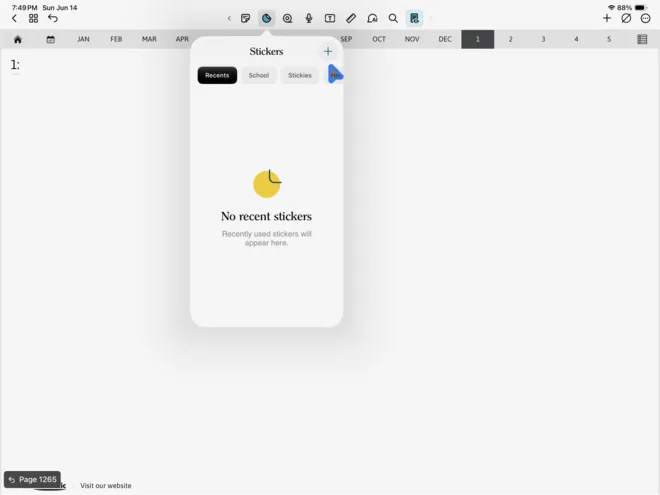
In the resulting “Add Sticker Pack” modal click the “Add” button.
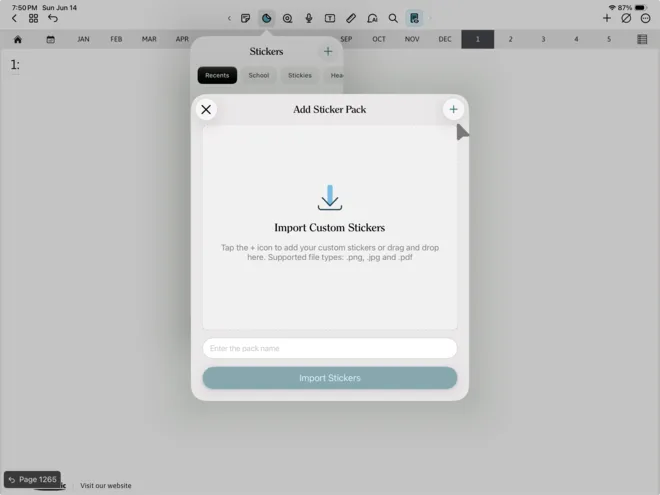
Click “Import from Files” menu item.
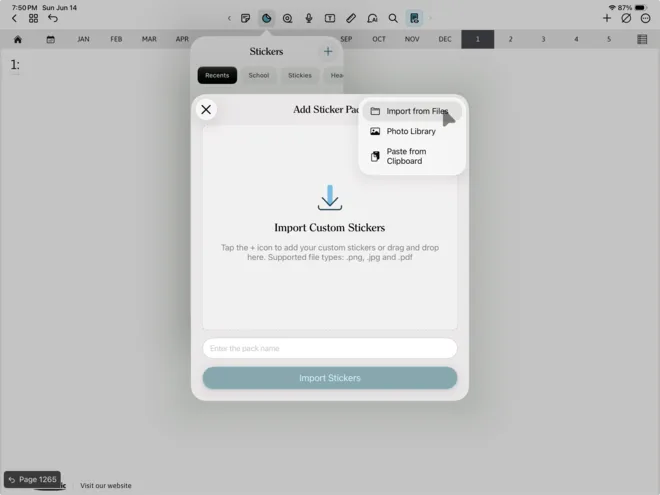
Navigate to the location at which you’ve downloaded your planner stickers.
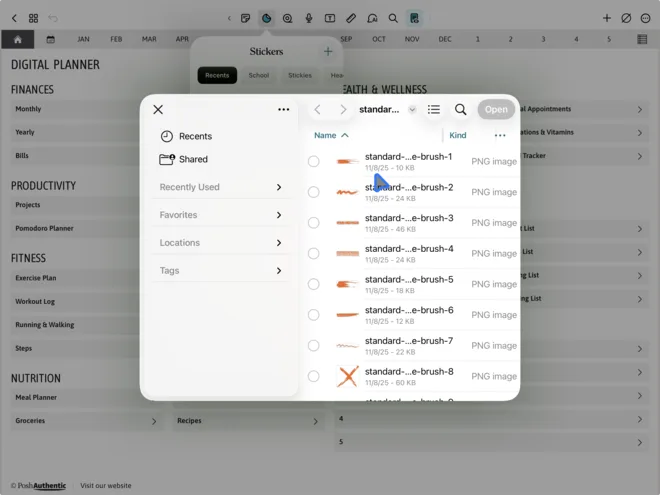
Click the sticker(s) to be added and click the “Open” button.
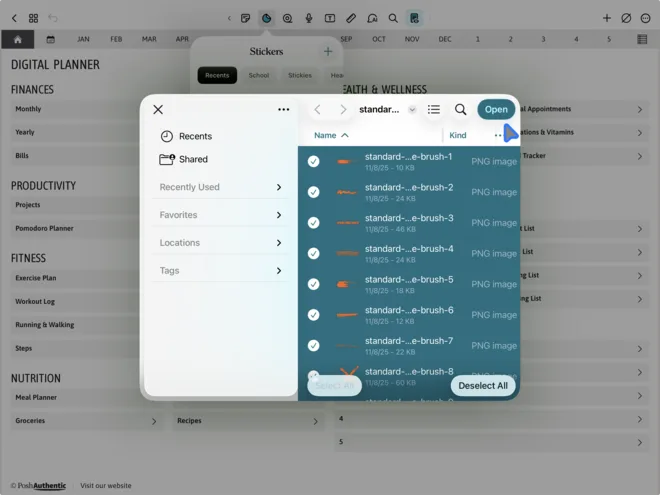
The opened stickers will now be loaded into the “Add Sticker Pack” modal. Give the sticker pack a name.
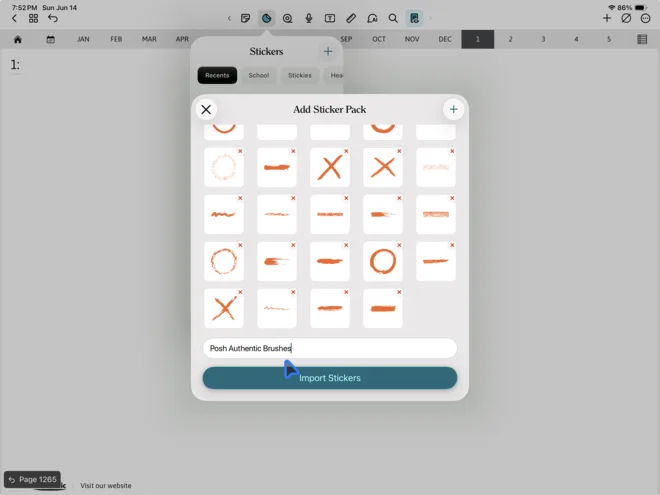
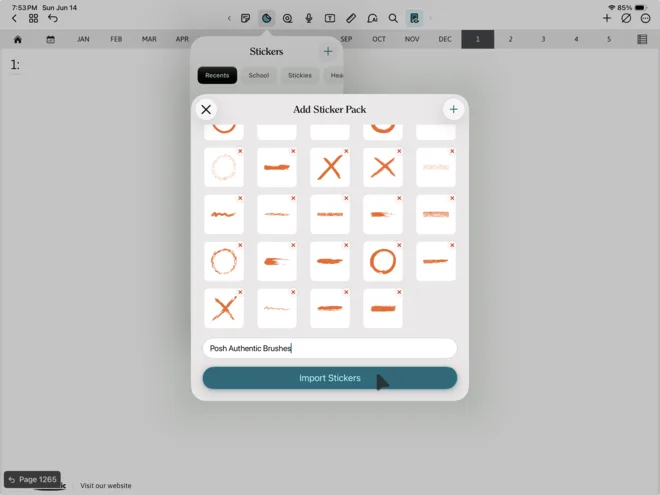
Click the “Import Stickers” button.
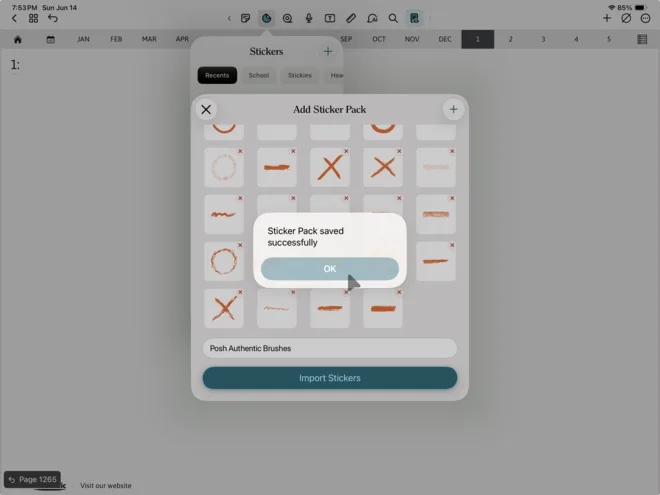
A message will appear stating “Sticker Pack saved successfully”. Click the “OK” button.
Your Sticker Pack will now be available in the “Stickers” drop-down menu.
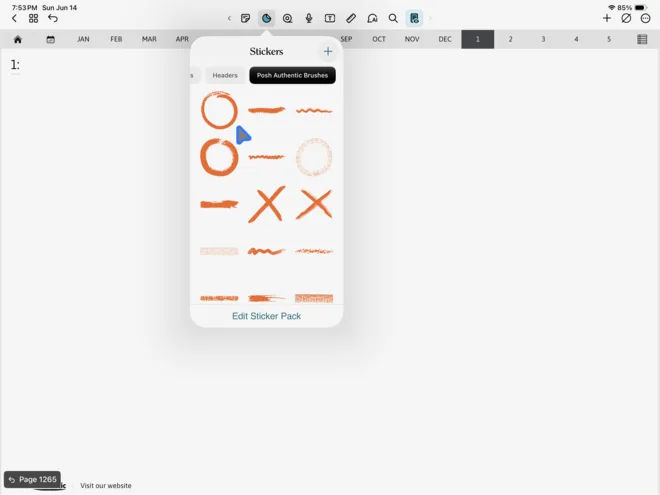
Click and drag a sticker to your page and position, resize or rotate it however you’d like.
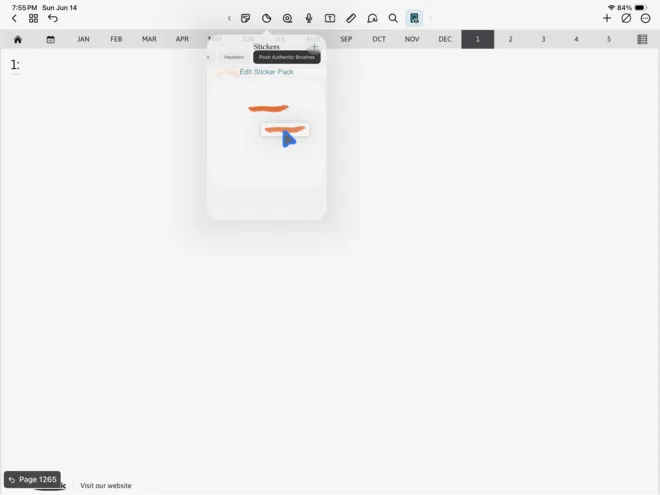
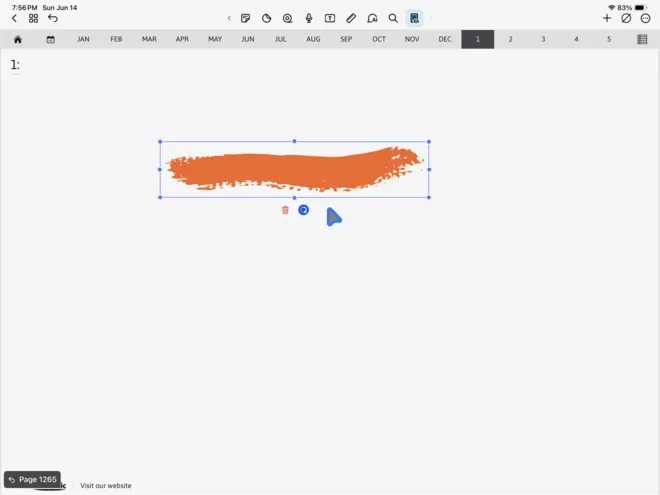
Noteful works the same way with one oddity at the start: you have to install its sample stickers before it will show you the full sticker interface. It’s a strange first step and it isn’t a sign anything has gone wrong.
NotefulUsing stickersShow 13 steps, 13 screenshots
With your planner open to the page you’d like to add a sticker to, click the “Stickers” button.
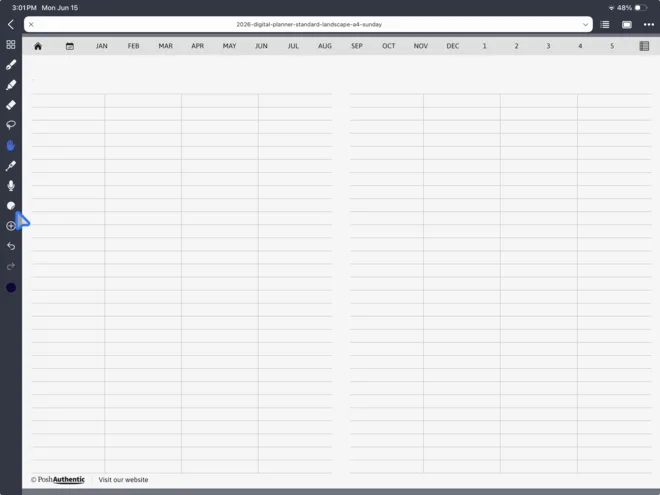
In the resulting “Recent Stickers” context menu click the “Install Samples” button. _(This is an extraneous step that Noteful unfortunately requires you do prior to gaining access to the full Sticker management user interface)_
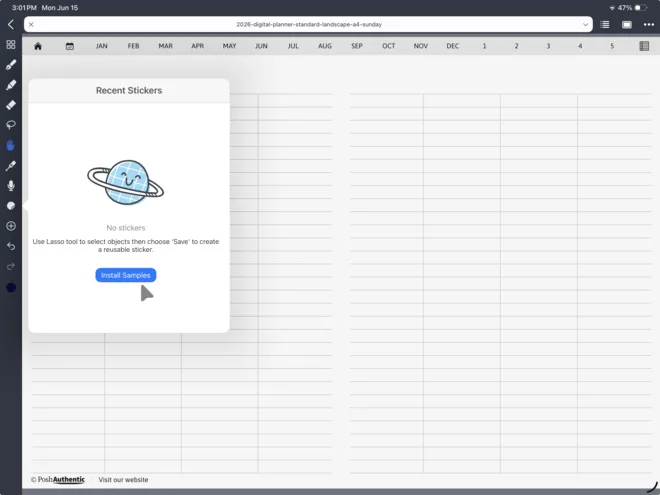
Now that the sample Sticker collection has been installed, you can click the “+”/Add button. Click it.
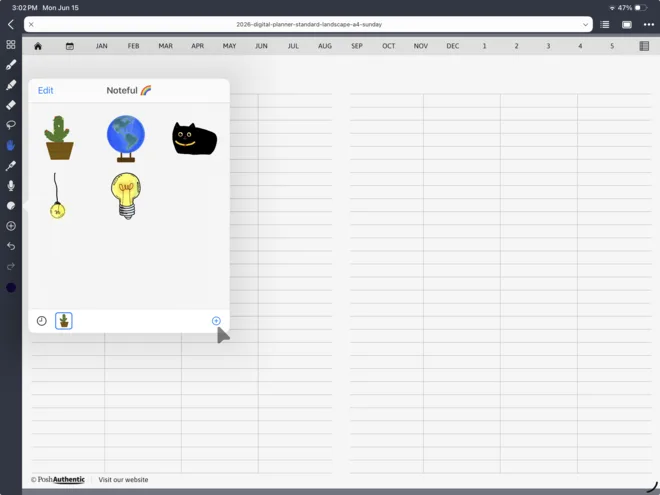
Let’s start by creating a new Sticker collection for you to add stickers to. Click the “New Collection” menu item.
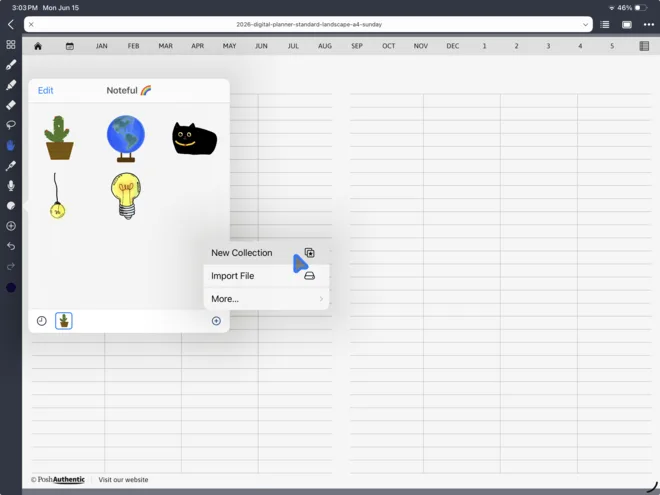
In the “Input Collection Name” modal, enter a Collection name and click the “OK” button.
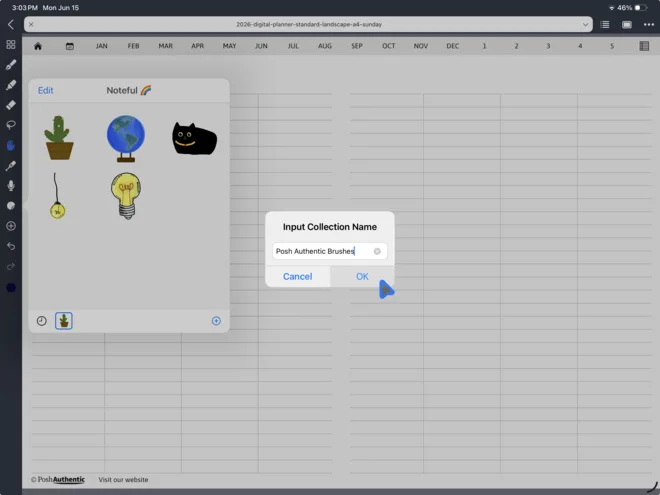
Now that your new Collection has been added, click the “+” button again.
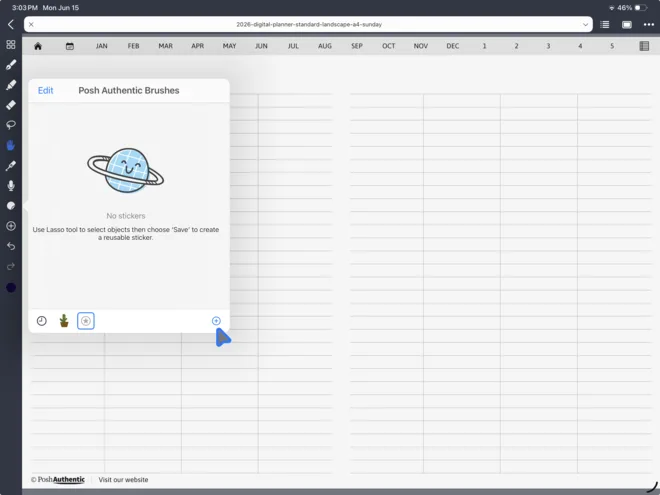
Click “Import File”.
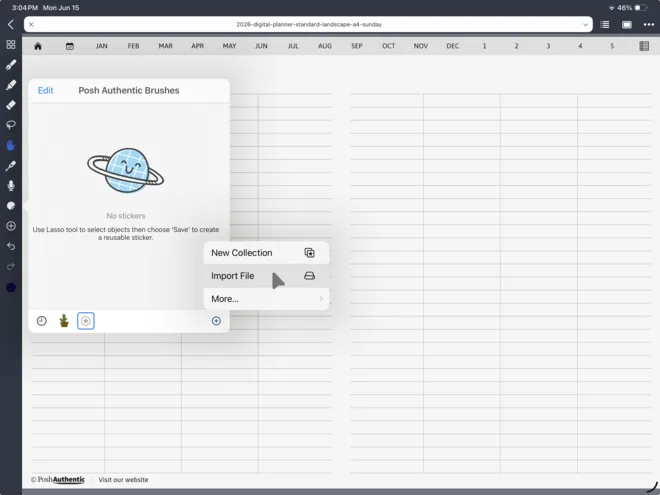
Navigate to the location at which you’ve downloaded your planner stickers.
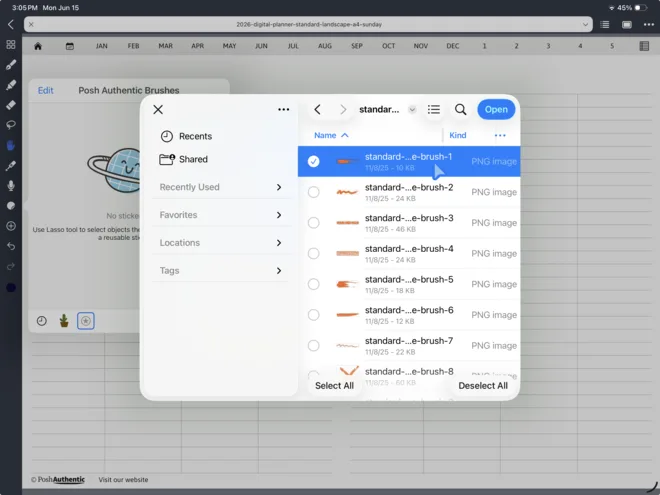
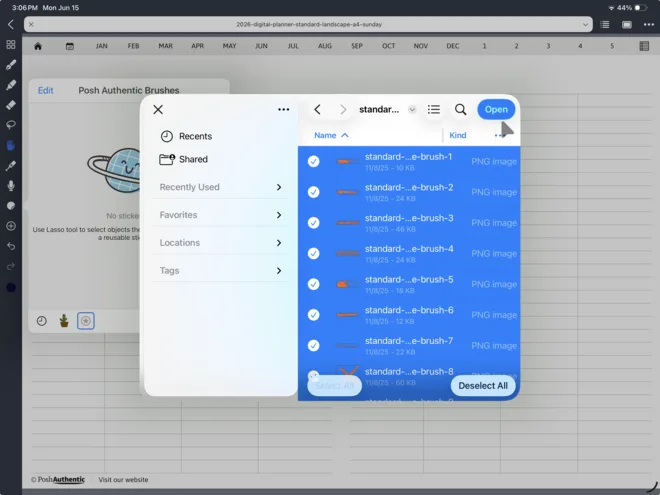
Select all the sticker that you’d like to add to the Collection and click the “Open” button.
In the “Choose Location” modal, select your new Collection as the destination for your imported stickers.
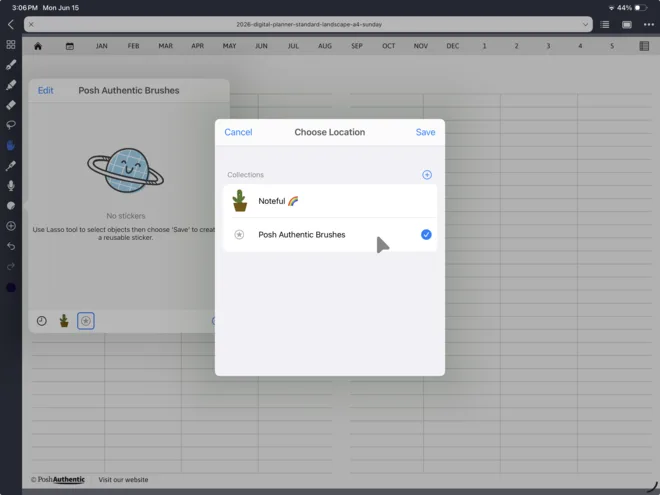
Click the “Save” button.
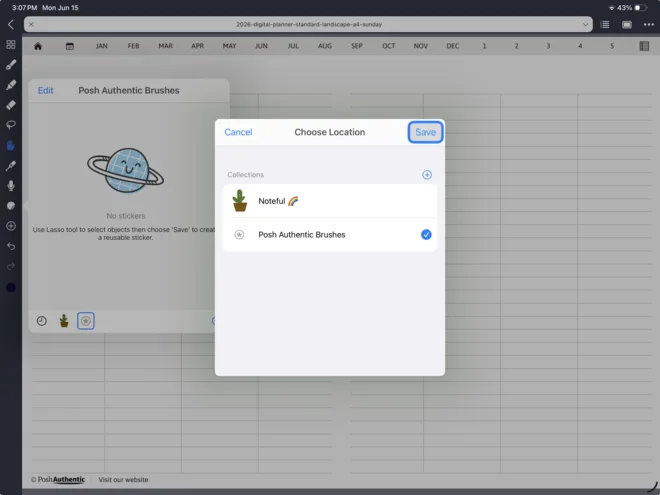
Your stickers have now been imported into your Collection.
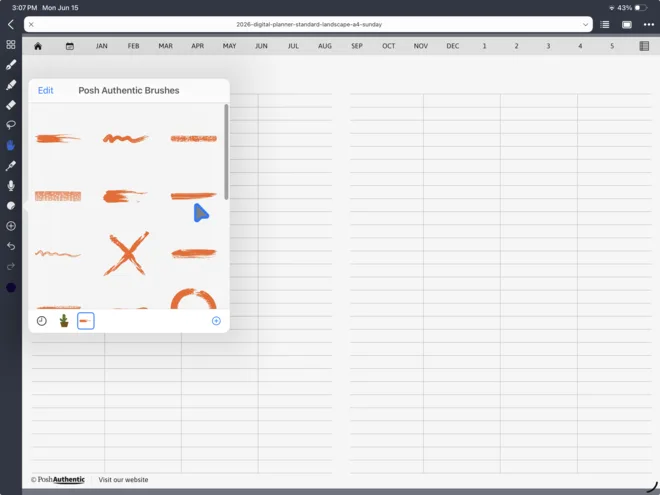
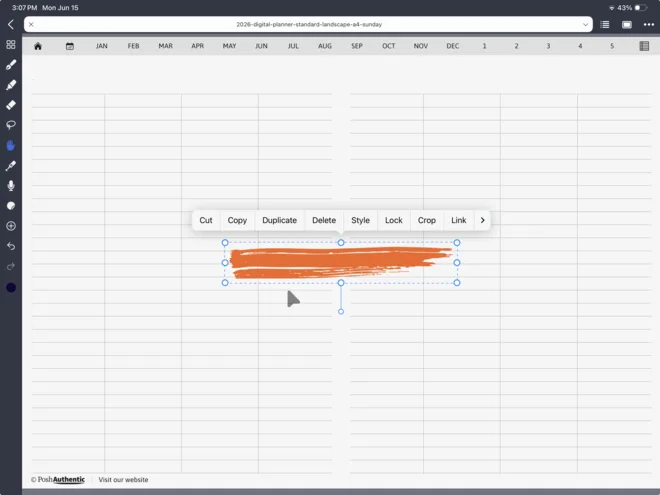
Click a sticker to add it to your page. Position, resize or rotate it however you’d like.
If your stickers came on a sheet
You don’t have to import anything. Open the sheet beside your planner, take the lasso tool, draw a loose circle around the sticker you want, then copy it and paste it into your page.
It’s the fastest way to try a set before committing to importing it, and for a sheet you’ll only dip into once or twice it’s the whole workflow. The one thing to know: lasso around the sticker, not through it, or you’ll paste half a leaf.
Once one is on the page
Tap it and you get handles. Drag to move, pinch or pull a corner to resize, twist to rotate. Most apps will let you send one behind another so a label can sit under a piece of washi tape.
The part people underestimate is that stickers are reusable forever. A paper sticker gets used once. A digital one is copy and paste — the same “Appointment” label can appear forty times across a year without running out, and if you decide in October that you hate it, you can delete every one.
What actually goes wrong
Almost every sticker problem is one of four things.
A white box around everything. The files are JPGs, not PNGs. Nothing to fix in the app.
They import blurry. The artwork was drawn small and you’re scaling it up. Stickers are usually made a good deal larger than you’ll use them, precisely so this doesn’t happen.
The app won’t open the collection file. Collection files are app-specific — a GoodNotes collection means nothing to Noteshelf. Use the loose PNGs instead; that’s what they’re there for.
They land as a full page instead of a sticker. You imported the sticker as a page template rather than into the sticker panel. Different slot, same menu region, easy to miss.
Can you print them?
You can, and mostly you shouldn’t.
Planner stickers are drawn for a screen. They’re sized in pixels for a tablet, they have no cut lines, and printing a sheet of them leaves you trimming shapes out with scissors and losing the transparency that made them work. If you want stickers on paper, buy printable sticker sheets — a different product, made with bleed and cut marks and a matte finish that takes ink.
The exception is a one-off. Printing a single label to stick in a paper notebook is fine. Just don’t buy a digital set intending to print the lot.
What to look for before you buy a set
- PNG, with transparent backgrounds. Stated plainly in the listing. If it isn’t said, ask.
- How it’s packaged. Loose files, a sheet, an app-specific collection, or several of those. All are fine; knowing which you’re getting isn’t optional.
- Whether it matches something. Stickers drawn in the same palette as your planner look deliberate. Stickers borrowed from three sets look like a ransom note, which is a look, but pick it on purpose.
- Count is a weak signal. Two thousand stickers is impressive and irrelevant if 1,900 of them are the same shape in a different colour. Look at the types — icons, labels, words, washi, widgets, numbers — because that’s what decides whether the set covers a real week.
Where to go next
- How to use a digital planner — setup, apps, and finding your way around
- Using your planner in GoodNotes — the app most sticker sets are built for
- Digital planning for beginners — if the stickers are the fun part and the rest is still new